

TS ODBC DataServer Utilities
Thoroughbred ODBC Administrator
Section titled “Thoroughbred ODBC Administrator”Configuring a Data Source
Section titled “Configuring a Data Source”Following the execution of the Expose Utility, the data source(s) are added to a client system by using the Thoroughbred ODBC Administrator. This program will collect the appropriate information and update the system registry so that ODBC-compliant applications can access the Thoroughbred data.
To execute the program from the Start menu, select TS ODBC DataServer Client→ Thoroughbred ODBC Administrator. The following screen will be displayed:
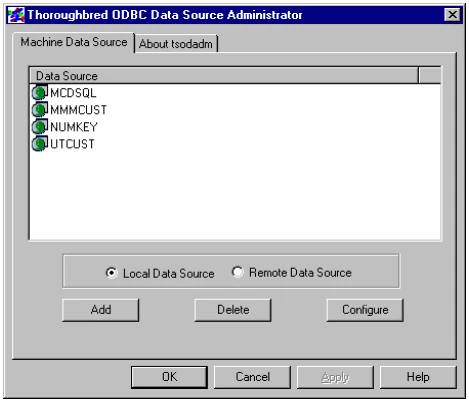
The main tab contains a section that selects the mode for data source configuration. Available modes are Local (Single-Tier) or Remote (Multiple-Tier).
The three buttons on the main tab execute the following processes:
Add – When selected will present one of the following set-up screens depending upon the mode selected:
Single-Tier
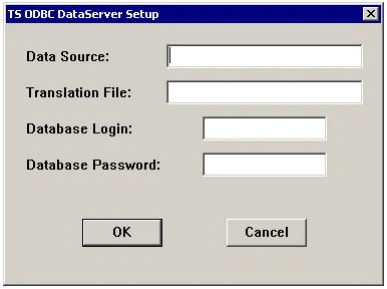
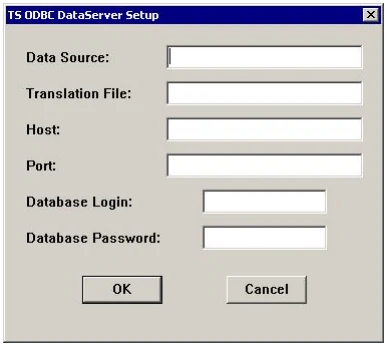
These screens contain the following entry fields:
Data Source – This must be the name of the Data Source created using the Expose Utility. Note that a Data Source name may not be created as both a Single-Tier and Multiple-Tier data source. That is, a name may appear in the local or remote list but not both.
Translation File – The full pathname of a .TXT file that contains the rules for character translation. Refer to the How to Build a Translation File section found later in this section.
Host – (Multiple-Tier only) The name of the server where the data resides.
Port – (Multiple-Tier only) The TCP/IP port number on which the server listens for requests. By default, both the client and server will communicate on port 20223. Therefore, this field may be left blank if there is no conflict with this port number on the server system. If a conflict exists, the port that the server uses for communication can be changed. Refer to the Change the Default TCP/IP Port section found later in this section.
Database Login and Database Password – Login and Password information may be entered which the ODBC Driver will use to login to the DataServer. Password information is displayed as several asterisks.
Delete – To delete a Data Source, select the mode, then click to highlight the Data Source to delete and click the delete button. The system will present the following dialog:
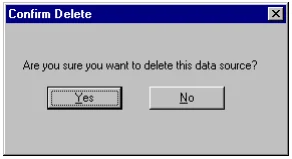
Yes – The system will delete the data source and return to the main Administrator menu. This will not affect any data in the Expose Utility.
No – The system will take no action and return to the main Administrator menu.
Configure – Depending upon the mode selected either the Single-Tier or the Multiple-Tier setup screen for the selected data source will be displayed (see Add mode above). Make the desired changes and click OK to save the changes.

How to Build a Translation File
Section titled “How to Build a Translation File”The Thoroughbred ODBC Driver can translate the data it transmits and receives from the server. The translation is controlled by rules stored in a Translation File. This file contains two sections, Output to Database and Input from Database, where the rules are listed. Usually, the sections are mirrors of each other.
A rule consists of a “search for” character list, an equal sign and a “replace with” character list. The “search for” list must contain at least one character that can be either a literal enclosed in single or double quotes or hexadecimal characters enclosed in dollar signs. The “search for” and “replace with” lists do not have to be the same length. The maximum length of a rule is 160 characters.
Comments may be included after *, # or ! characters.
The following are sample Translation Files that could be used with data files that contain $5D$ and $7D$ to represent characters from another keyboard:
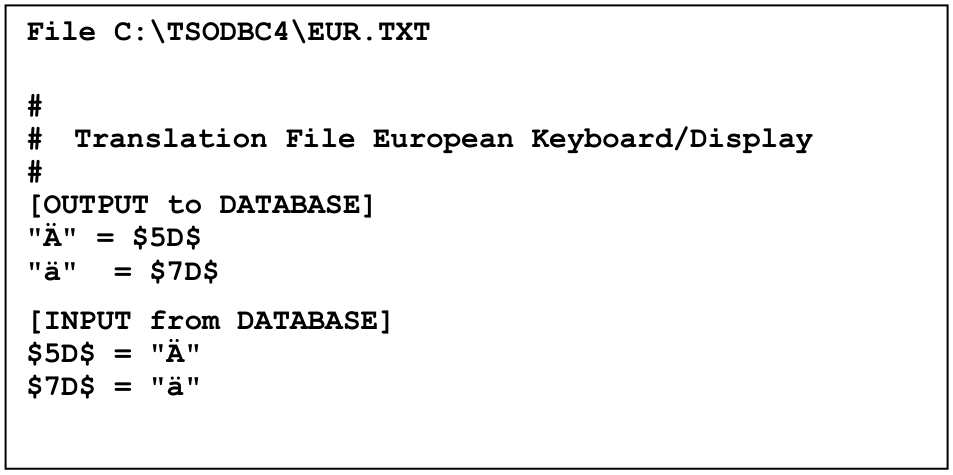
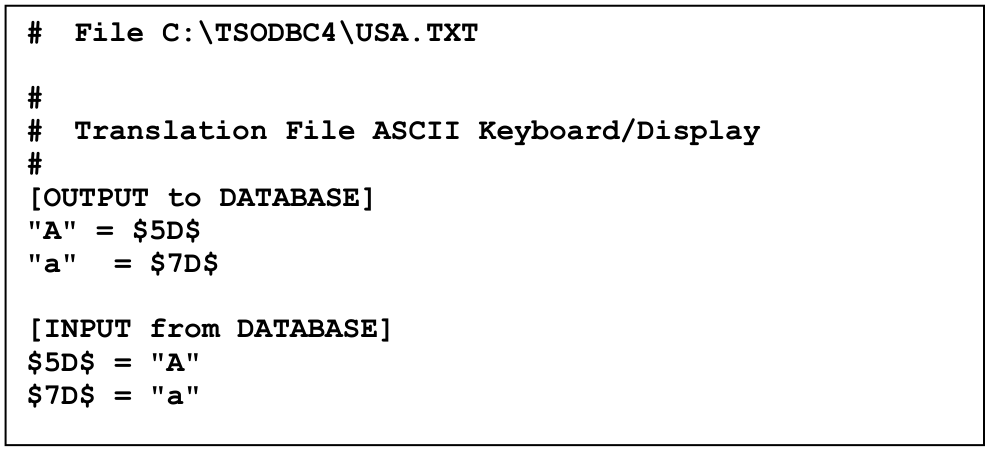
Using the example files, two clients with different keyboards and displays can access the same data.
The Translation File can be specified in the Translation File field of the Thoroughbred ODBC Administrator. The full pathname must be included. When the data source is saved, the translation rules are checked for errors and the information is stored in the client registry. Saving the information in the registry improves the performance of the TS ODBC DataServer Driver. However, if the Translation File is modified, the data source must be resaved via the Thoroughbred Administrator in order for the new translation rules to take effect.
If the rules checking process discovers an error one of the following messages may be displayed:
! Cannot access Translation File. Translation is disabled.
This message occurs when either the translation file cannot be opened or a section name does not contain matching brackets.
! Error in Translation File line NN. Translation is disabled.
This message indicates a problem in line NN of the file. The cause can be:
- Missing or unmatched delimiters
- An invalid or odd number of hexadecimal digits
- A line exceeding the maximum 160 characters
- An empty “search for” list
- A section name that did not begin in position 1
- Comments not preceded by a comment character
Change the Default TCP/IP Port (Multiple-Tier only)
Section titled “Change the Default TCP/IP Port (Multiple-Tier only)”Should a conflict arise with the default TCP/IP port (20223), the server can be configured to communicate with the client system on a user specified port number. To enable this, start the server process with the following syntax:
tfodbcd –p port-numberwhere port-number represents an available TCP/IP port value.
Then enter the same port number in the Port Number field when defining the Remote Data Source through the Thoroughbred ODBC Administrator on the client system.
Thoroughbred ODBC Query
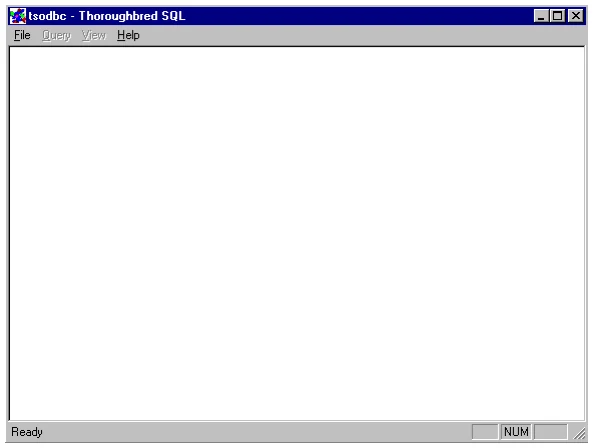
Section titled “Thoroughbred ODBC Query”This utility is provided to test the Data Source setup once it has been created or modified. It is intended to be used as a diagnostic tool only. The result set is limited to the first 100 records that satisfy the query. To execute the program from the Start menu, select TS ODBC DataServer Client → Thoroughbred ODBC Query. The following screen will be displayed:
Accessing Data
Section titled “Accessing Data”The first step is to open a Data Source. Select the File menu and the Open Data Source menu item. The following screen will be displayed:
If the data source to test uses the Single-Tier driver select Local Data Source to display the list of defined Single-Tier data sources. To test a Multiple-Tier data source, select the Remote Data Source option to display the list of defined Multiple-Tier data sources.
To select a data source to test, highlight it and click OK. The following screen will be displayed:
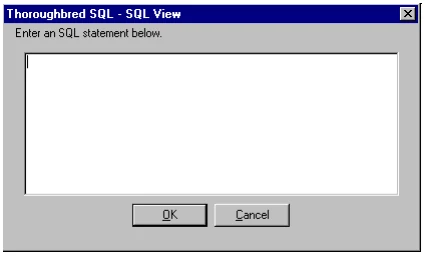
Enter any valid SQL statement to query a table or tables defined in the selected data source. After the statement is complete, click OK. The results of the query will be displayed in the Results window. You can toggle between the Results and Query windows by selecting the View menu and selecting the desired item.
Each data source contains a table, called ODLQTBLE, which can be used to display the list of tables that the data source contains.
To view this list, enter the following command in the SQL View window:
SELECT * FROM ODLQTBLEthen click OK. A screen similar to the following will be displayed:
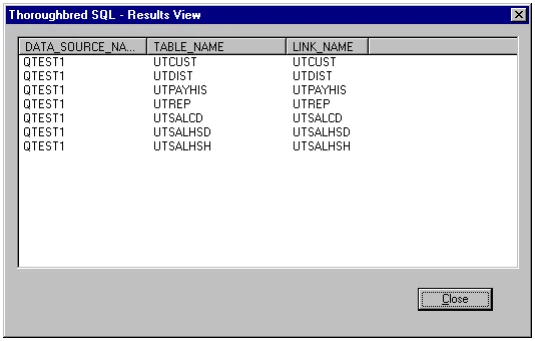
The data displayed includes the data source name, table name and Dictionary-IV link name. The values in the table name column can be used for other query functions.
SQL Examples
Section titled “SQL Examples”The following SQL syntax examples can be used to verify a connection to the data source. This is not intended to demonstrate all of the capabilities of SQL. The examples are included solely for the purposes of using this tool for diagnosing the connection between the client and server systems.
The simplest statement, an example of which was used in the previous section, is constructed as follows:
SELECT * FROM ODLQTBLEIn this statement, the * represents all fields (columns) in the table. The result would contain all data for all fields found in the table ODLTBLE. This statement can also be entered as:
SELECT DATA_SOURCE_NAME, TABLE_NAME, LINK_NAME FROM ODLQTBLEIn this example, the * has been logically expanded to list the field names. To display a subset of the fields in a table enter:
SELECT TABLE_NAME FROM ODLQTBLEThe result set will contain only the table name data from the ODLQTBLE table.
Handling Errors
Section titled “Handling Errors”Based on the error returned, one of the following actions may be required:
- Correct the SQL statement.
- Modify the data source to correct server information.
- For Multiple-Tier data sources, check the TCP/IP connection between the server and the client system.
Saving and Retrieving Queries
Section titled “Saving and Retrieving Queries”This product also contains a feature to save and retrieve SQL statements from a file. After entering a SQL statement in the Query window, select the Query option from the menu and choose Save. A dialog will be displayed that gives the option to select a directory and to save the query. To retrieve the SQL statement later, select the Query menu and choose Open. A similar dialog will appear to allow the file containing the SQL statement to be opened. Once opened, the SQL statement will appear in the Query window.
Server Process Viewer (Windows Server only)
Section titled “Server Process Viewer (Windows Server only)”This utility can be used to display process information for the TS ODBC DataServer server and associated processes.
To execute the utility, from the Start Menu, select the Thoroughbred Software program group and click TS ODBC DataServer Process Viewer. A screen similar to the following is displayed:
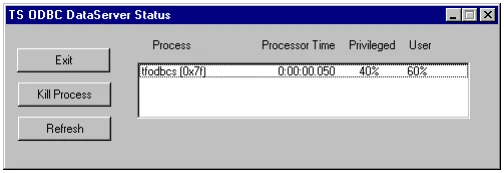
The following options are available:
Exit: Closes the viewer
Kill Process: This will stop the selected process. To select a process, point to the desired process and click. Warning: Killing a process in the manner should only take place after all normal methods have been exhausted. Refer to the Managing the Server Process section in this manual.
Refresh: This list is not dynamic. Click this option to refresh the view data.
From the TS ODBC DataServer Reference, version 8.9.1. Open this page in the PDF