

Using the Screen Editor
From the Screen Editor you can add text, add special code characters, and fields.
Quick Key Reference (Screen Editor)
Section titled “Quick Key Reference (Screen Editor)”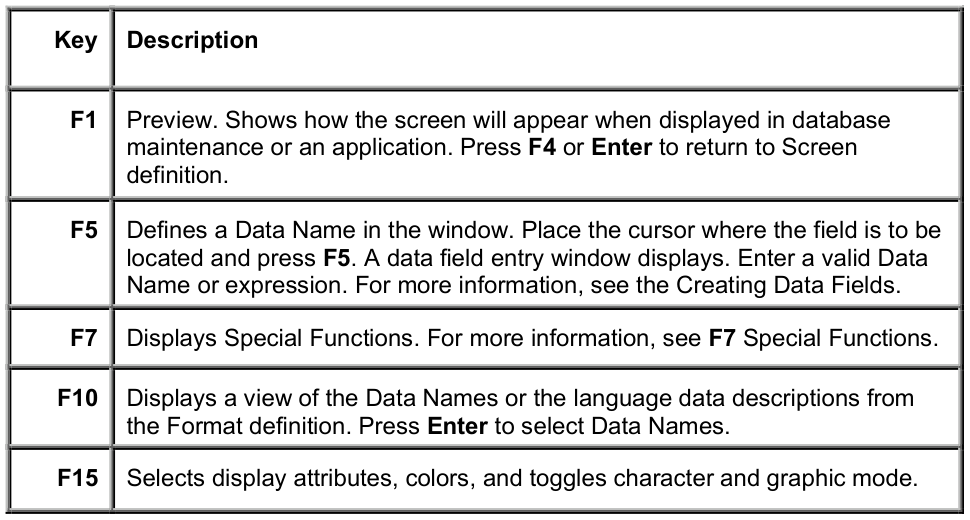
Special Code Characters
Section titled “Special Code Characters”Special codes are provided to display information that might change each time the screen is accessed. The special code characters that can be used are:
| /D | System Date (DAY) |
| /d | Terminal Date |
| /f | File Suffix Value |
| /I | Installation Name |
| /i | Terminal ID |
| /L | Language Code |
| /n | Name of Window |
| /o | Operator Code |
| /T | Time (12-hour, no seconds) |
| /t | Time (TIM) |
All special code characters must be preceded by a space.
When using the special code characters, you must consider the length of the resulting value and position the code on the screen accordingly. For example, /D results in an 8-character date when the screen displays.
Press F1 to preview the screen as it will appear during database maintenance. The special codes are replaced with the corresponding current values.
F7 Special Functions
Section titled “F7 Special Functions”Select F7 Special Functions.
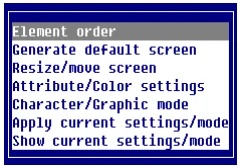
Element order
Use this function to control the order in which Data Names are collected during data entry.
Key Data Names must be the first elements and must be sequential.
Select Element order. The system prompts with a listing of the Data Names:
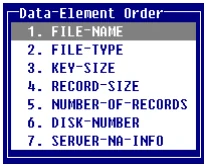
The system lists each Data Name from the corresponding format. Select the Data Name to be moved and the system prompts:
Move data-element number x to:__
Type the number of the position where you want the Data Name to move. Press Enter. The data field moves to the new location in the list and the items reorder.
The Data Name order does not change on the screen, only the collection order changes during screen maintenance. For example, if you move the Rep-Code in UTCUST from its current position (8) to a new position (3), the positions do not change on the screen. When you perform screen maintenance you will enter the Customer-Code, Customer-Name, Rep-Code, Address, and then continue in the defined order.
Generate default screen
Allows you to display the system-generated screen. Select Generate Default Screen.
The system prompts:
Do you want to generate default screen?
Select Y to generate the default screen (system generated screen) in the Screen Editor area. You may edit it to produce a custom screen.
Prior to creating the default screen, use the Resize/Move option to create an appropriate screen size.
Resize/move screen
Allows you to resize and move the screen.
Select Resize/move screen. The system displays the resize box in the lower right corner. Press F1 to toggle between resizing and moving the window.
Resize
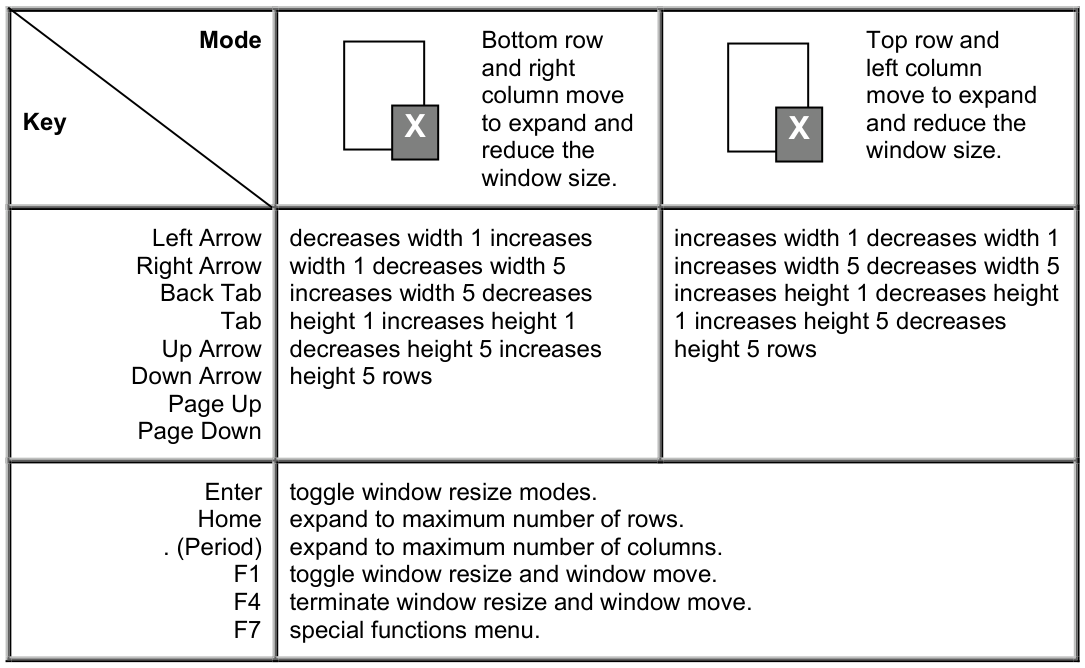
Press F7 to select the following options:
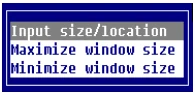
Input size/location Allows the size of a text window to be changed. The window text size values will be displayed in the edit mode window.
Window Size: 78 columns, 11 rows.
Coordinates: column 0, row 10.
Maximize window size Expands the window size to the maximum size allowed. The window location will not be changed. The window will be expanded from the top down and from right to left.
Minimize window size Reduces the window size to the minimum size allowed. The window will be reduced from the bottom up and from right to left.
Move
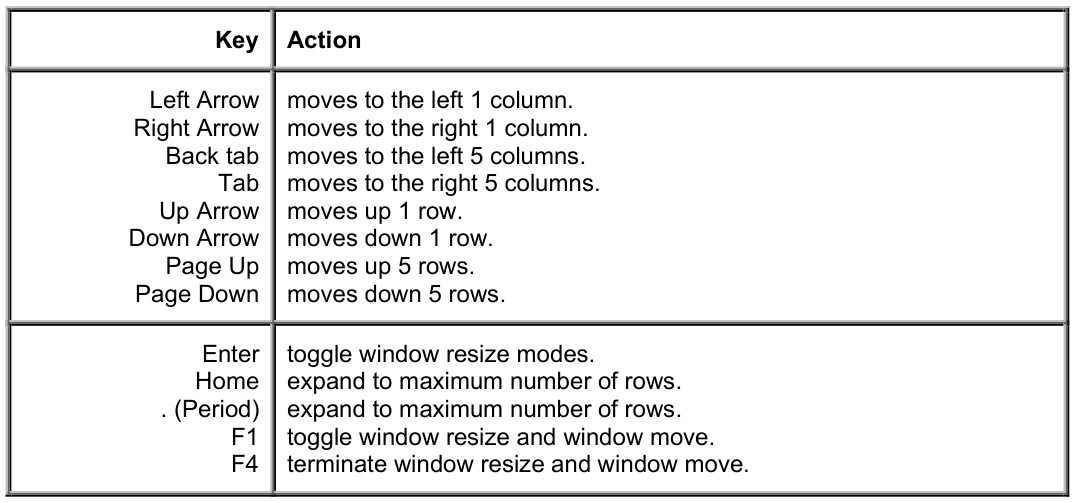
Attribute/Color settings The display attributes, color settings, and character and graphic modes can be controlled from here or by pressing F15. For more information, see F15 Character/Graphics Mode - Video Attributes, Graphics, and Color.
Character/Graphic mode
This option toggles between character and graphic mode.
Apply current settings/mode This option applies the current display attribute/color settings and character/graphic mode based on the current cursor position. The settings display in the edit mode window at the bottom of the screen.
Show current settings/mode This option displays the current display attribute/color settings and character/graphic mode based on the current cursor position. The settings display in the edit mode window at the bottom right corner of the screen.
F15 Character/Graphics Mode Video Attributes, Graphics, and Color
Section titled “F15 Character/Graphics Mode Video Attributes, Graphics, and Color”Specifies the text and background attributes to be used in the window and, if you are using a properly configured color terminal, the use foreground and background color.
If you are operating on a black and white terminal:
- You can only select the window attributes (any combination of reverse video, underscore, background, and blink).
If you are operating on a color terminal:
- You can select the window attributes (any combination of reverse video, underscore, background, and blink).
- You can select colors for the text foreground and background on your custom screen. You may select from up to 16 colors.
- You can only select colors if the Save Color Maps has been enabled in Installation Information. For more information, see the Utilities Reference in the Dictionary-IV Administrator Guide.
The window attributes and colors should be set before entering text or codes. To change them for text already entered, you must select window attribute and/or color then type over the existing text.
Press F15.
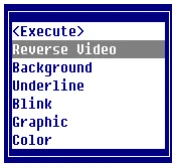
You may toggle Reverse Video, Background, Underline, and Blink. For more information on using the color pallet, see Using Attributes/Color Settings. Once you make your selections you select <Execute>.
A status bar appears at the bottom of the screen that displays the currently selected attributes.
Window Attributes
The window attributes available are:
None
Full intensity characters.
Reverse Video

Full intensity background (area
around characters).
Background
- R
- or background). Half intensity (can be characters
Blink
Blinking area of screen.
Underline
Underscored area of screen.
These attributes may be used in any combination providing 16 different combinations.
It is important to remember that all terminals do not support underscore and blink.

- Foreground
- Background
Set your default window attributes in the Window Configurator. For more information, see Window Configurator in the Dictionary-IV Administrator Guide.
Foreground/Background Color
There are 16 colors available for the Foreground and Background.
These colors will display only if the option for Display Default Colors in the Operator Code screen is set to N. If this option is not specified or is set to Y, the default colors from the color selector will be used when the window is displayed. For more information, see Operator Code Information, Operator Information, and Window Configurator in the Dictionary-IV Administrator Guide.
You can only select colors if Save Color Maps has been enabled in the Installation Information. For more information see Installation Information in the Dictionary-IV Administrator Guide.
When you make your selections, the system displays a sample at the bottom of the window.
Using Attributes/Color Setting
Keys available in this option are:
- Left Arrow
- Moves the lightbar left across the Foreground/Background color.
- Right Arrow
- Moves the lightbar right across the Foreground/Background color.
- Up Arrow
- Moves the lightbar up from Foreground to Background attributes.
- Down Arrow
- Moves the lightbar down from Foreground to Background attributes.
- F4
- Exits returns to the pop-up menu.
- F6
- Displays on-line help.
- F7
- Restores the original attribute/color settings.
Place the cursor where the window attribute or color is to begin. Select the Attribute/Color Settings option. The system displays one of following:
Color Terminal
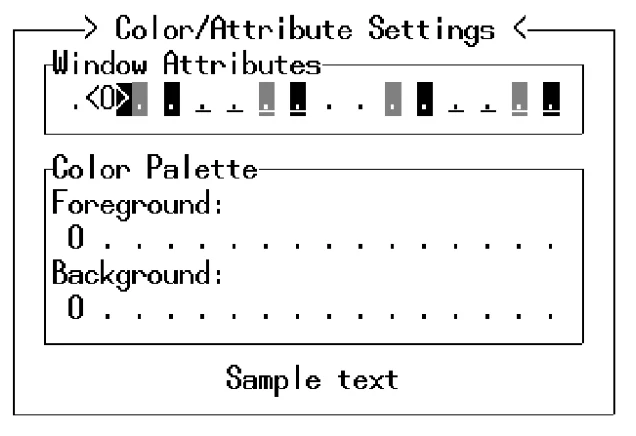
Black and White Terminal
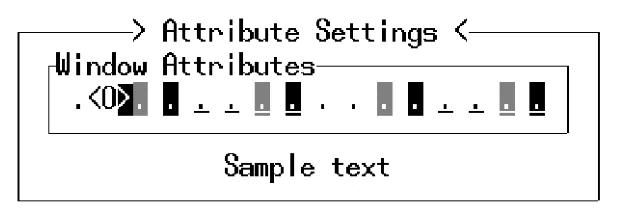
The <0> indicates the current setting. Use the appropriate arrow keys to make your selection. Your selections appear at the bottom of the window as Sample text.
Press F4 to exit then select <Execute> to save your selection. Type the text or press F5 to insert an entry field. The system displays the text or entry field in the attribute/color selection you have chosen.
You may continue using this selection or make another selection. When you exit and save the screen modifications, the system saves the attributes/color selections you made. If you create another screen, the system returns to your default colors.
These default colors are defined in the Window Configurator. For more information, see Window Configurator in the Dictionary-IV Administrator Guide.
The color attributes cannot be changed if the ability to save the color attributes has been disabled. Once this feature has been disabled, color attributes will be lost when the window is saved. If color text is saved on a non-color terminal, color attributes will be lost when the window is saved.
Character/Graphic Mode
Select this to toggle between character and graphic mode.
In the character mode, the numbers operate normally. In the graphic mode they create graphic lines.
The following shows the numeric keypad in the character mode (left) and in the graphic mode (right):
Character/Graphic Mode
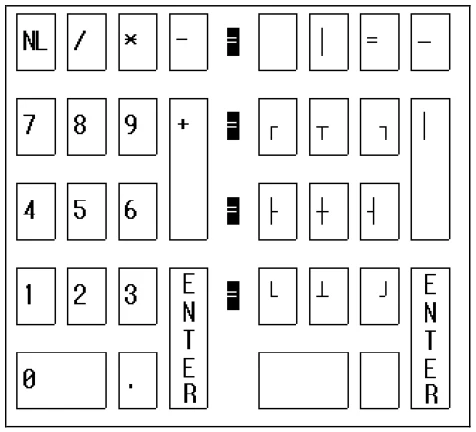
The cursor keys and edit keys still function as in character mode. All other keys are invalid and a “ring bell” will occur if they are used.
Cursor movement will be clockwise after graphic corners are entered and will go in the direction of an intersect graphic character. A graphic center intersect will use the last direction mode.
From the Dictionary-IV Developer Guide, version 8.9.1. Open this page in the PDF