

Changing the Appearance of a View
You can change the appearance of a default or custom view and save it for future use. The following keys alter the appearance of a view.
Quick Key Reference
Section titled “Quick Key Reference”| Key | Description |
|---|---|
| F1 | Resize/Move window. For more information see Resize/Move Window. |
| F4 | End. |
| F6 | Help. |
| F7 | Special functions. |
| F8 | Commands. |
| F9 | Single record maintenance. |
| F10 | Goto a specified row or column. |
| F11 | Field definition. |
| F16 | Print copy. |
| Enter | Switches to the edit field mode for the column selected. From the edit field mode, it also exits to the cursor mode. |
| Right/Left Arrow | Moves lightbar one field right and left. It wraps on border. (See Tab/Back Tab for horizontal scrolling.) |
| Down/Up Arrow | Moves lightbar down and up one row. It scrolls at the border. |
| Character Delete | Removes the current column from the view. |
| Character Insert | Recovers a column at the current position. |
| Line | Deletes rows from or inserts rows into a view. Deletes/adds records. |
| Delete/Insert | |
| Tab/Back Tab | Moves lightbar one field right and left. It scrolls the view on the border. |
| Home | Positions the lightbar at the first or last row of a view or the top row of a view. |
| Page Down/Up | Moves the lightbar down and up. It goes to next/previous page. |
To insert a column at the end of a view, position the lightbar at the last column. Press Character-Insert, select the column to restore, and press the Right Arrow key instead of Enter. You may also select a column from a different link. For more information see Char-Insert Using a Different link.
Cursor Movement in Cursor Mode (Through the View)
Section titled “Cursor Movement in Cursor Mode (Through the View)”When you first access the View you are in cursor mode. In cursor mode you can move through the View or modify the View.
This section describes keyboard functions in the cursor mode. You may scroll through the View using the following keys:
Page Up/Down
Moves up/down one view length.
- View Size = 5 Records
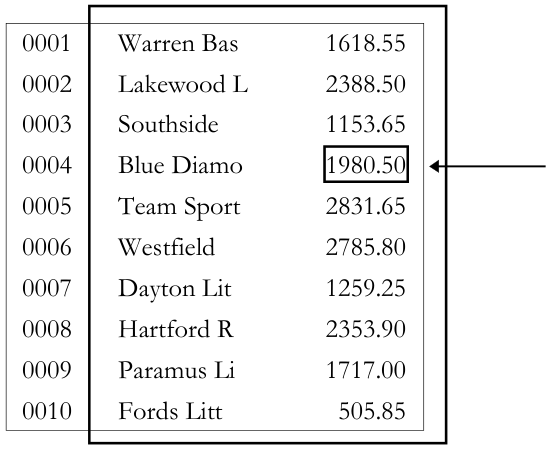
- Press Page Down to see the next 5 records. 0001 Warren Bas 1618.55 0001 Warren Bas 1618.55 0002 Lakewood L 2388.50 0002 Lakewood L 2388.50 0003 Southside 1153.65 0003 Southside 1153.65 0004 Blue Diamo 1980.50 0004 Blue Diamo 1980.50 0005 Team Sport 2831.65 0005 Team Sport 2831.65 0006 Westfield 2785.80 0006 Westfield 2785.80 0007 Dayton Lit 1259.25 0007 Dayton Lit 1259.25 0008 Hartford R 2353.90 0008 Hartford R 2353.90 0009 Paramus Li 1717.00 0009 Paramus Li 1717.00 0010 Fords Litt 505.85 0010 Fords Litt 505.85
- Name Database = 10 Records
- Press Page Up to see the previous 5 records.
Up/Down Arrow
Moves up/down one record within the field.
Press Down Arrow to
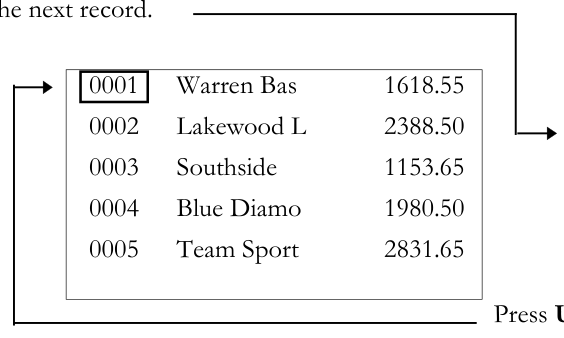
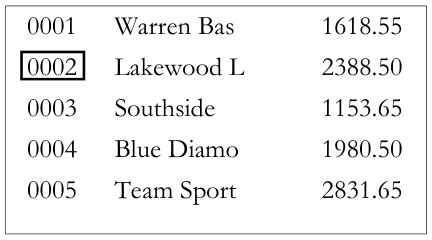
Up Arrow to select the previous record.
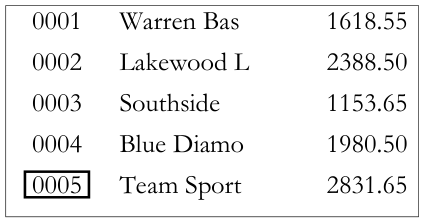
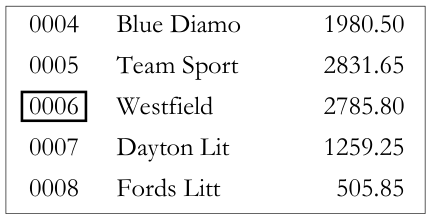
Press Down Arrow at the bottom of the view.
The lightbar scrolls down according to the following formula:
Number-of-lines-in-view / 2
Press Up Arrow at the top of the view. The lightbar scrolls up according to the above formula.
Left/Right Arrow
Press Right Arrow to

select the next field.
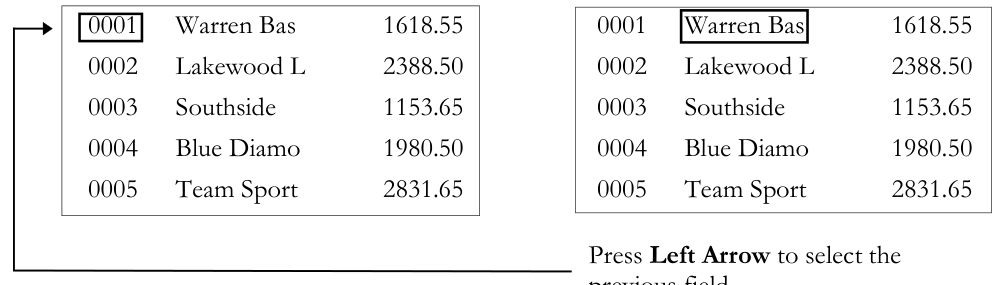
previous field.
Moves left/right one field within the window. It does not scroll outside the window.
Tab/Back Tab Moves one field to the right/left. If it reaches the right most field in window, the tab scrolls to the next field outside the window.
Press Tab to select the next field

within the view.
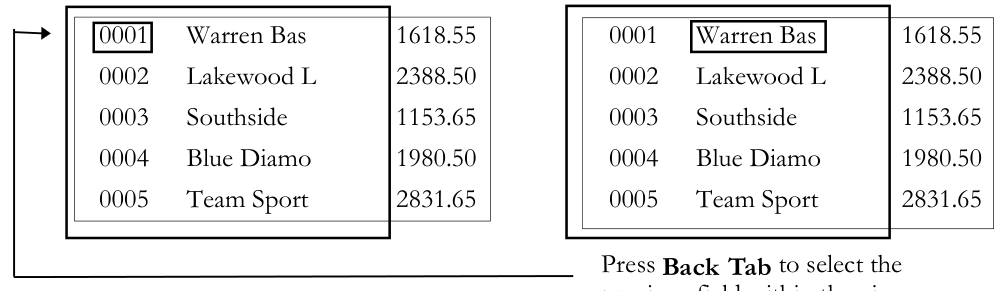
previous field within the view.
Press Tab to scroll forward
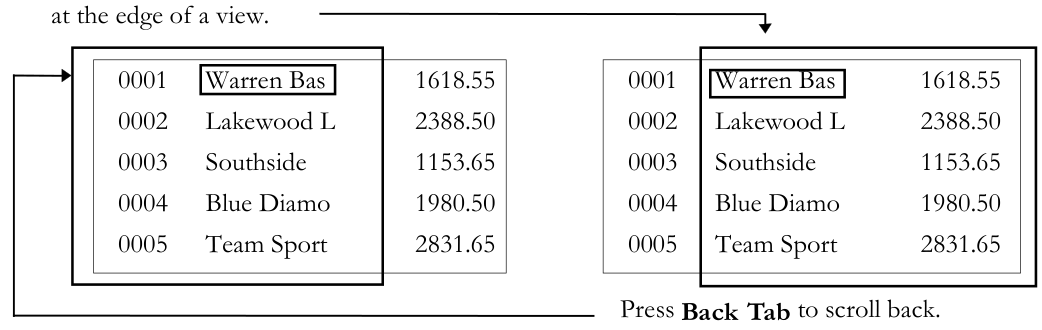
Home
The action of the Home key depends on where it is currently positioned.
Moves first to the leftmost position of the current window. Moves to the leftmost field of the current record. Moves to the first field of the first record in the window. Moves to the first field of the first record in the file. Moves to the first field of the last record in the file. Moves to the first field in the current window.
Initial position
Press the Home key to move to the left-most field of the current window.
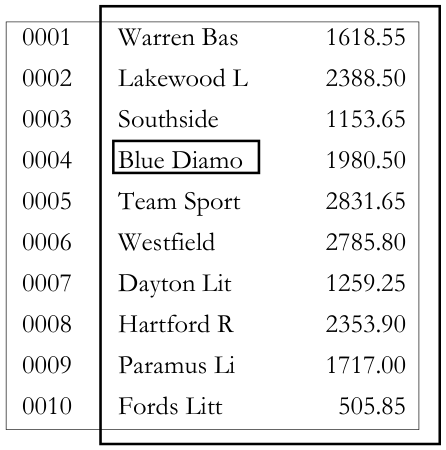
Press the Home key to move to the left-most field of the current record.
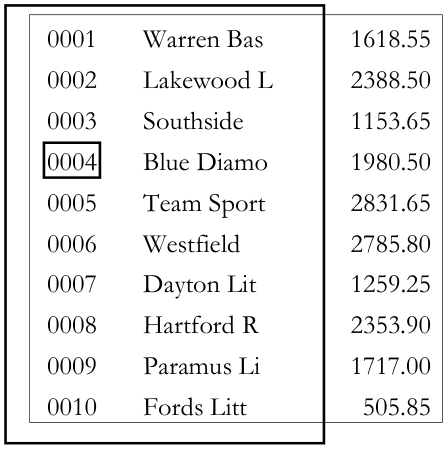
Press the Home key to move to the first field of the first record in the window.
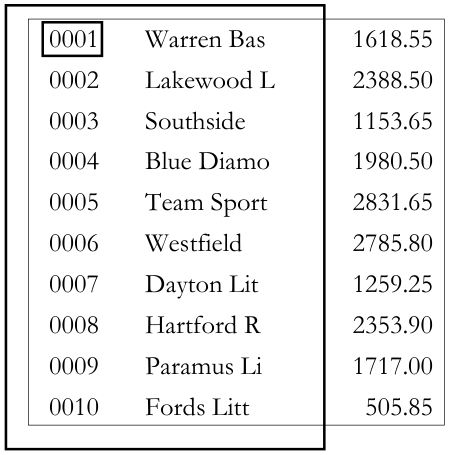
.
Press the Home key to move to the last record in the file.
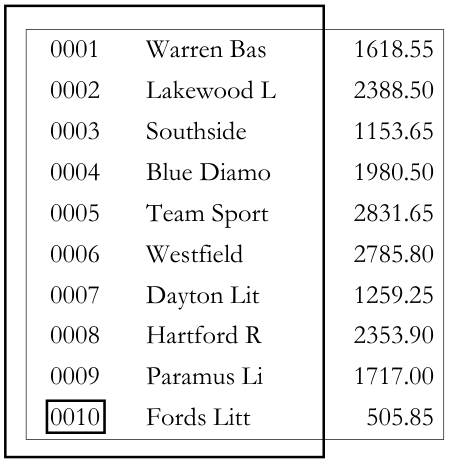
.
The Home key now toggles between the first field of the first and last records in the file.
Enter
Selects the field edit mode. For more information see Software Conventions (Field Edit).
F1 Resize/move view
Section titled “F1 Resize/move view”Moves or resizes the window.
The system displays the resize box in the lower left corner. Press Enter to move between resize modes. Press F1 to toggle between resizing and moving the window.
Resize Window
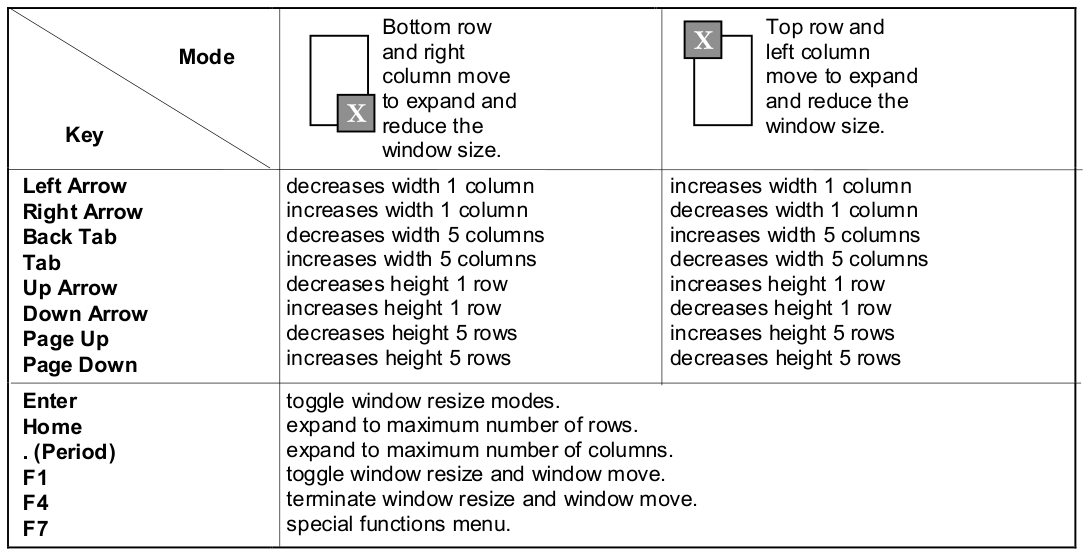
Press F7 to select the following options:
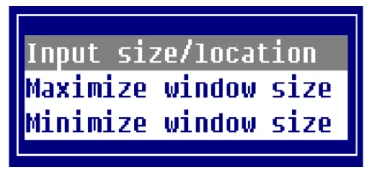
Input size/location Allows the size of a text window to be changed. The window text size values will be displayed in an input window.
Window Size: 78 columns, 11 rows.
Coordinates: column 0, row 10.
The above window size values are columns and rows of text excluding borders.
Maximize window size Expands the window size to the maximum size allowed. The window location will not be changed. The window will be expanded from the top down and from right to left
Minimize window size Reduces the window size to the minimum size allowed. The window will be reduced from the bottom up and from right to left.
Press F1 to enter the move mode.
| Move Window | |
|---|---|
| Key | Description |
| Left Arrow | Moves to the left 1 column. |
| Right Arrow | Moves to the right 1 column. |
| Back Tab | Moves to the left 5 columns. |
| Tab | Moves to the right 5 columns. |
| Up Arrow | Moves up 1 row. |
| Down Arrow | Moves down 1 row. |
| Page Up | Moves up 5 rows. |
| Page Down | Moves down 5 rows. |
| Enter | Toggle window resize modes. |
| Home | Expand to maximum number of rows. |
| . (Period) | Expand to maximum number of rows. |
| F1 | Toggle window resize and window move. |
| F4 | Terminate window resize and window move. |
F6 On-line Help
Section titled “F6 On-line Help”Displays on-line help. When you press F6 the system displays the following pop-up menu:
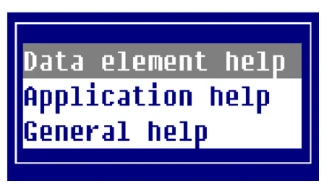
Data element help
This displays on-line help for the current column.
Application help This contains a help module, which provides overall help for the view. Usually this help gives the user an idea as to the need for a view rather than detail information about individual items in the view.
General help
This displays on-line help that describes how to use the view. The following help displays.
General On-line Help
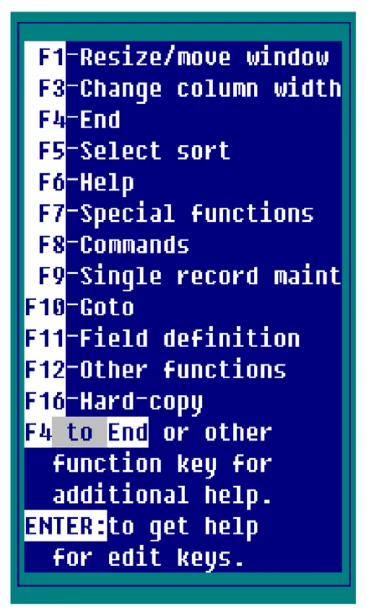
Press a function key or Enter for detailed information. Press F4 to exit.
Character-Insert Using a Different Link
Section titled “Character-Insert Using a Different Link”You may add columns to the view using a Link to another Format. When you press Character-Insert the system displays a window similar to the following:
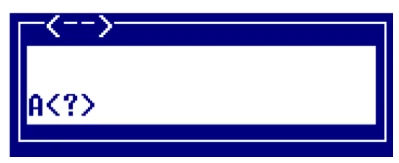
The A<?> (B<?>,C<?>, etc.) option allows you to define a column from a different Link. By default, the system creates the column to the left of the position of the lightbar.
Press the Right Arrow key to create the column to the right of the lightbar.
Select A<?>. The system displays the following:

Enter the following information:
Column size
Type the length of this new column and press Enter.
Column link.dataname Type the 3 to 8 character Link name and data name for the field to display in this view. The Link must define a keyed data file. The data name must be contained in the Format specified in the Link.
Example:
In a view that uses the Link UTCUST, UTREP.REP-NAME would select the data element REP-NAME from the UTREP Format. The system would place the sales rep names in the view. This works because the field REP-CODE exists in UTCUST. The same data name is the key in UTREP, therefore linkage is possible.
F7 Special Functions
Section titled “F7 Special Functions”Select F7 Special functions and the system displays the following:
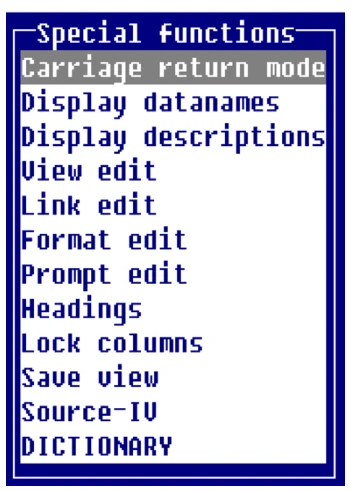
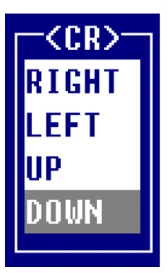
Carriage return mode Controls the direction the lightbar will move after field editing. Valid directions are right, left, up, and down.
Display datanames Turns the data name display feature on and off. When on, the following information about the current column appears at the bottom of the view:
- Data name.
- Maximum entry length of the field.
- Current width of the column.
- Carriage return direction mode (Enter key).
Display Data Names
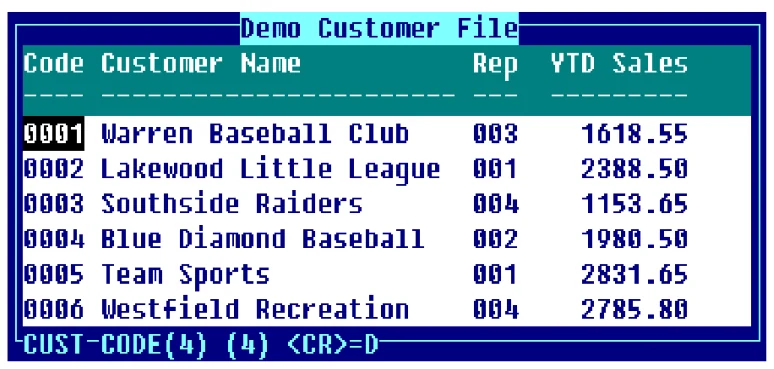
- CUST-CODE
- Data Name
- Current column width
- Maximum field entry length
- <CR>=D
- Carriage return mode
Display descriptions Turns the description display feature on and off. When on, the following information about the current column appears at the bottom of the view.
Data description (defined in format).
Display Data Descriptions
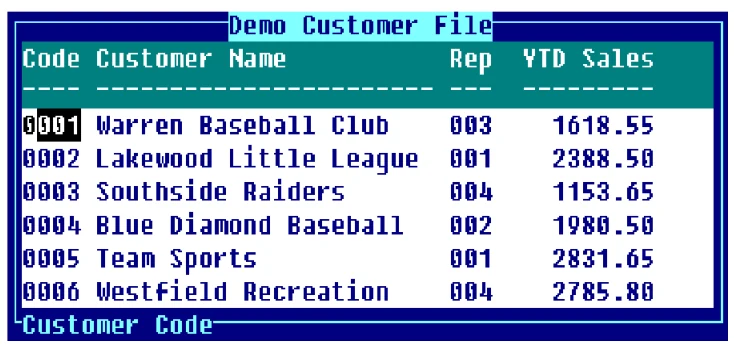
- Customer Code
- Data description.
View edit Allows modifications to the view specifications. Each specification that can be modified will have help available (F6). If access is denied to this function, see your system administrator for additional explanation.
View Edit
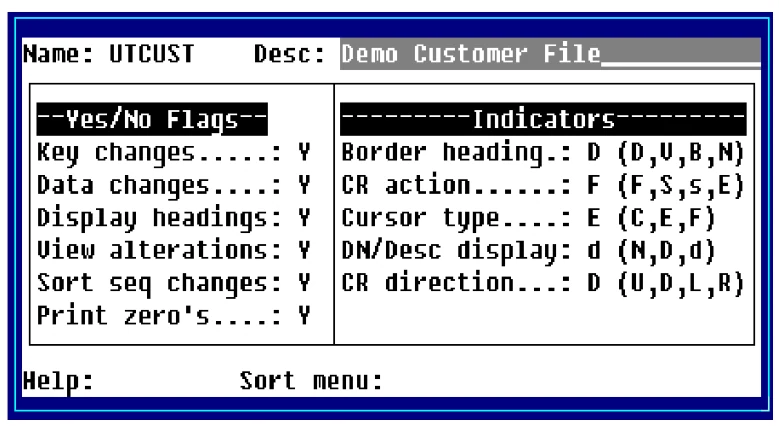
Key changes Controls the ability to add, delete, and modify records and to use F8 CHANGE, DELETE, COPY, and MOVE commands in a view. Select one of the following:
Y Allows changes to the key fields in the view.
N Does not allow you to change the key fields.
Data changes Controls the ability to add, delete, and modify records and to use F8 CHANGE, DELETE, COPY, and MOVE commands in a view. Select one of the following:
Y Allows changes to the non-key fields in the view.
N Does not allow you to change the non-key fields.
Display headings
Turns on or off the view headings. Select one of the following:
Y Displays the heading lines.
N Does not display the heading lines.
View alterations
Controls the ability to delete or insert columns or to save a view. Select one of the following:
Y Allows view specification changes.
N Does not allow view specification changes.
Sort seq changes
Turn on or off the ability to use F5 Sort to select a different sort sequence. Select one of the following:
Y Allows view sort changes.
N Does not allow view sort changes.
Print zeros
Display/print zeros or blanks for the numeric value zero. Select one of the following:
Y Prints zeros (0) when the numeric data is zero (0).
N Prints blanks when the numeric data is zero (0).
Border heading Contains view window heading specifications. The headings always display in the top border of the view window. Select one of the following:
D The view description is centered in the top border.
V The eight-character view name is displayed in the left-most top border.
B Both the eight-character view name and description are displayed in the top border.
N No headings display in the top border.
CR Action
Defines the action of the Enter key while in the view. Select one of the following:
F Enter the normal field edit mode.
S Enter screen maintenance.
s Enter screen maintenance and return to View after record is edited.
E Exit the view.
Cursor type
Defines the view lightbar specifications. Select one of the following:
C One character cursor marks the column/row intersection.
E Full field lightbar marks the column/row intersection.
F The full row is marked with the lightbar.
DN/Desc display
Displays the data names in the bottom border of the view flag. Select one of the following:
N Do not display the data name or description.
D Display the data name.
d Display the data name description.
CR direction Defines the direction of the lightbar movement after pressing the Enter key to modify a field. Select one of the following:
U The lightbar goes up to the prior row.
D The lightbar goes down to the next row.
L The lightbar goes left to the previous column.
R The lightbar goes right to the next column.
Help Contains the name of the help module, which provides the text, to use for the view under the application help option.
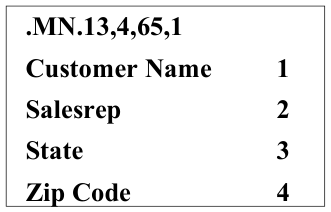
Sort Menu Contains the name of a menu to be used in place of the default selection pop-up menu. This menu can be more application specific than the default sort selection menu.
Example:
In a customer file you may decide to restrict usage of a sort on sales. You may create a custom sort menu that does not include this sales sort.
When defining a sort menu, you must return a valid sort number with each selection contained in the developer-supplied menu. For example:
It also allows you to present the data in a more readable display.
View Method Contains the name of a developer supplied method that will be called each time a view row is to be displayed. The method will build all new column values that have been defined by new columns A<x> through Z<x>. The view method is specified in the view header.
Link edit Displays the Link Definition for this View. You may edit this definition and sorts. For more information see Link Definition in the Dictionary-IV Developer Guide.
If the system denies you access to this function see your system administrator for assistance.
Format edit Displays the Format Definition for this View. You may edit this definition. For more information see Format Definition in the Dictionary-IV Developer Guide.
If the system denies you access to this function see your system administrator for assistance.
Prompt edit Modifies the help text containing view/screen prompts that were referenced by VP[n] or SP[n]. For more information, see Format Definition in the Dictionary-IV Developer Guide.
Headings Activates the heading edit mode. If headings have not been defined for a view, one blank line will be inserted and the entire view is shifted down. Once in heading edit mode, the Arrow and Tab keys can be used to select the desired column. You may type the desired heading values. Use the Line Insert key to add as many heading lines as desired.
To remove a heading line press Line Delete. Press F4 to exit heading mode.
You may make the column width larger than the field length defined in the format. This does not allow you to change the length of the data entered in the column, but it does allow you to increase the width of the heading.
For example: If you have a 2-character State column, you may press F7, select Column width, and increase the size to 5. This still only allows 2-character data entry, but allows you a 5-character heading. You may now type the heading State.
Lock columns Locks and unlocks columns to the left of and including the column on which the lightbar is located. These columns remain stationary when scrolling in the view.
Lock Columns
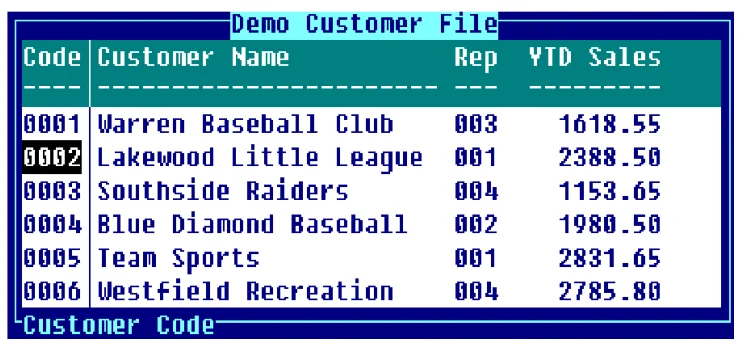
Vertical line designates a locked column.
If two columns were locked, the vertical line would be placed to the right of the Customer Name column. These two columns then remain stationary when scrolling in the view.
Save view Saves the view. The save process preserves all view attributes including deleted and locked columns, reduced field sizes, sort pattern, and any view size. There is no prompt for a view name or confirmation of changes.
Source-IV Displays the Source-IV menu and allows you to make selections. This function is only available if the environment is defined as an OPENworkshop Development environment.
For more information see the Source-IV and OPENworkshop reference manuals.
DICTIONARY
Displays the following menu:
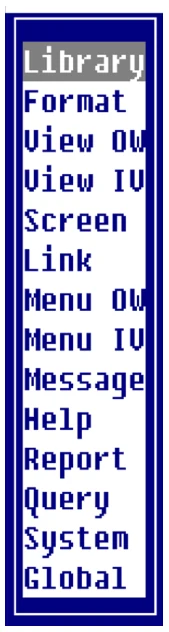
This function is only available if the environment is defined as an OPENworkshop development environment.
For more information about the Class Definitions see the Dictionary-IV Developer Guide. For more information see the OPENworkshop Reference Manual.
F10 Goto
Section titled “F10 Goto”Positions to a column or row specified by an operator-entered key. The system prompts:
F1-Left, F2-Right, F10-Goto Column
To go to a specific row, type the key value (for the selected sort). The system begins the view with the closest match to the value you typed. To go to a specific column, you can use the following function keys:
- F1
- Moves to the right-most column.
- F2
- Moves to the left-most column.
- F10
- Displays a lookup of columns. You may select the column to move to.
F11 Field Definition
Section titled “F11 Field Definition”Allows the display of data name attributes for the column on which the cursor is located.
The following function keys are active:
- F3
- Displays the following menu:
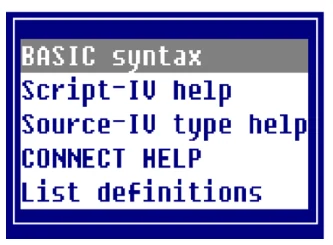
You can display help for Basic, Script-IV, Source-IV, and CONNECT. It also allows you to list the definitions class (Formats, Screens, Views, Links, Menus, Messages, Help, Windowed Help, Scripts, Reports, and Queries).
- F7
- Displays the following menu:
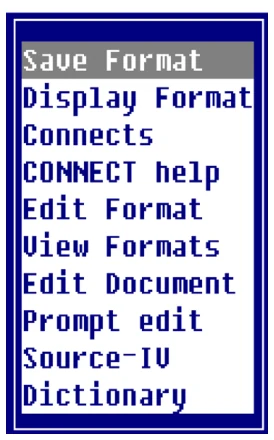
- F10
- Displays the Command Line Entry Window. You can press F10 to display the Command Line Entry Window. From this window you can perform Dictionary-IV maintenance, CONNECT to Utility Methods, and CONNECT to Developer Methods. Access to the F10 command line can be blocked by disabling this feature in the Installation Information screen. For more information see the OPENworkshop Reference Manual.
Save Format
Saves modifications made to the data element attributes.
Display Format
Displays the entire Format.
Connects
Displays data names that have CONNECT directives.
CONNECT help
Connects to a Help menu that provides detail help for using the CONNECT directive.
Edit Format
Allows you to edit the current Format.
View Formats
Displays a View of Formats.
Edit Document
Allows you to edit the text document.
Source-IV
Connects to the Source-IV Main Menu.
Dictionary
Connects to the Dictionary-IV Main Menu.
- F11
- Displays the Data name and attributes. Position the cursor at the column you wish to view and press F11. The system displays the following (for more information see Format Definition in the Dictionary-IV Developer Guide):
- Fld Num
- Displays the number of the field.
- Data Name
- Displays the Data name.
- Size
- Displays the length of the field.
- FS
- Displays Y if field separators are used; displays N if field separators are not used.
- Help Code
- Displays the name of the help file.
- KY
- Displays Y if this field is a key; displays N if this field is not a key.
- ET
- Displays the entry type (optional, fixed length/optional, variable length/required, fixed length/required, variable length).
- NT
- Displays the numeric type.
- PD
- Displays the padding type.
- DT
- Displays the date formatting.
- YN
- Displays Y if this is a Yes/No field; Displays N if this is not a Yes/No field.
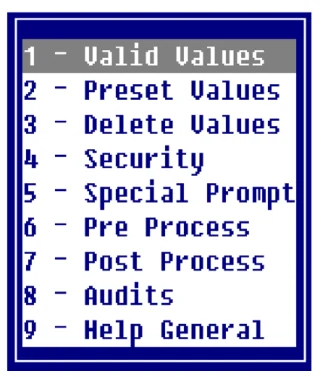
Format Offset Press F11 again to display the following attributes:
From the Dictionary-IV User Guide, version 8.9.1. Open this page in the PDF