

Backup/Restore
This utility allows you to backup or restore the contents of the System Dictionary file (IDDBD), the Global Dictionary file (IDGBD), and the data files associated with links. It does not backup/restore data files external to Dictionary-IV.
If you wish to backup data files external to Dictionary-IV, you must use the backup facilities provided by your operating system.
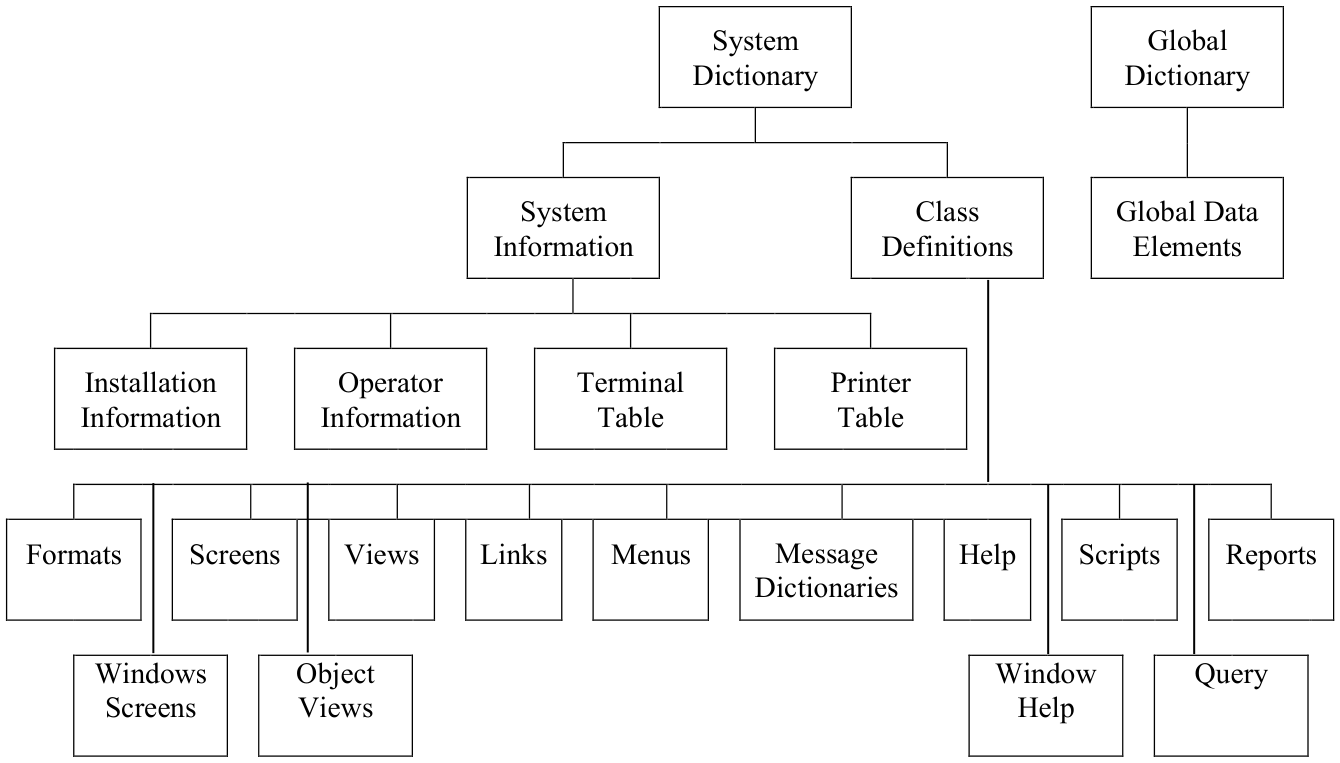
This option allows you to backup and restore the following components:
Backup and Restore Components
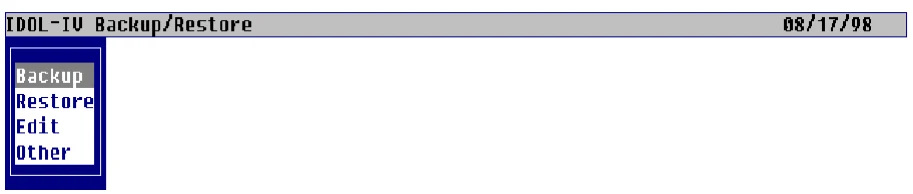
Select Backup/Restore from the Thoroughbred Dictionary-IV Utilities Menu. The system displays the following:
Backup
Section titled “Backup”The backup files are created on your system hard disk. If you wish to transfer the files to diskette or tape, you need to use the facilities provided by your operating system.
The Escape key can be used to terminate a backup.
Select Backup and the system prompts:
Enter name for backup file (IDDbkxxx): IDDbk______
IDDbk with 3 optional alphanumeric characters for a suffix is the suggested naming convention, however not required. The backup file name is not limited to 8 characters it can be up to 14 characters or can have a fully qualified path of up to 60 characters. A full path to the backup file can be used only if a hierarchical directory is defined in the IPL file. Type the backup file name and press Enter.
If the file doesn’t exist, you will be prompted to create the new backup, which you will be able to edit.
If the file name exists, the system prompts:
- File exists:
- Append Clear
Select one of the following:
Append
Adds the new backup files to the end of the existing file.
Clear
Writes the new backup files over the existing file.
The backup is accomplished by using the Backup Selection screen to build a list of components to be included in the backup. On completion of the selection process, backup files are built.
The system displays the following pop-up menu:
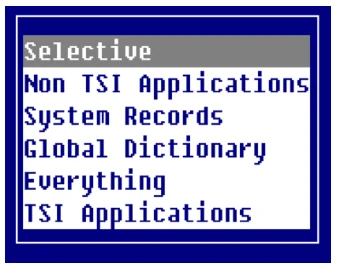
Select one of the above and press Enter:
Selective This selection will display the Backup/Restore Selection View. For each library the specific definition types can be selected or unselected. All libraries except for TSI libraries will be included in this view. None of the definition types will be selected as the default.
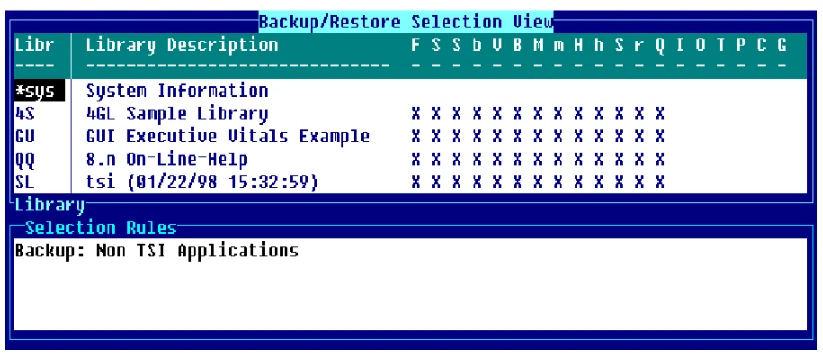
Non-TSI Applications This selection will display the Backup/Restore Selection View. For each library the specific definition types can be selected or unselected. All libraries except the TSI product libraries will be included. All definition types except for system records will be selected as the default.
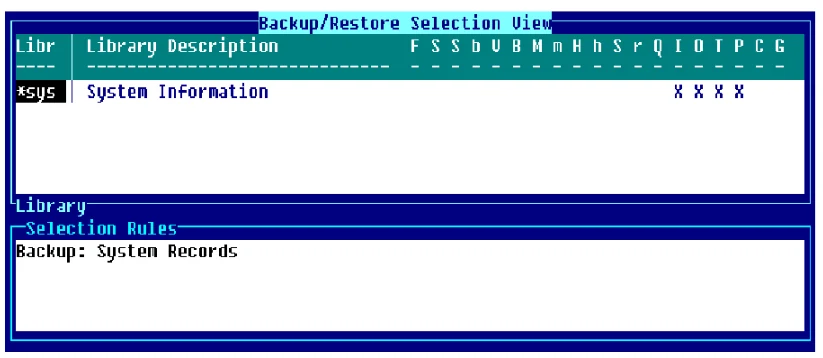
System Records This selection will display the Backup/Restore Selection View. For each library the specific definition types can be selected or unselected. All system record types except the Global Dictionary will be selected.
Global Dictionary
This selection will backup the Global Dictionary. No other options are available.
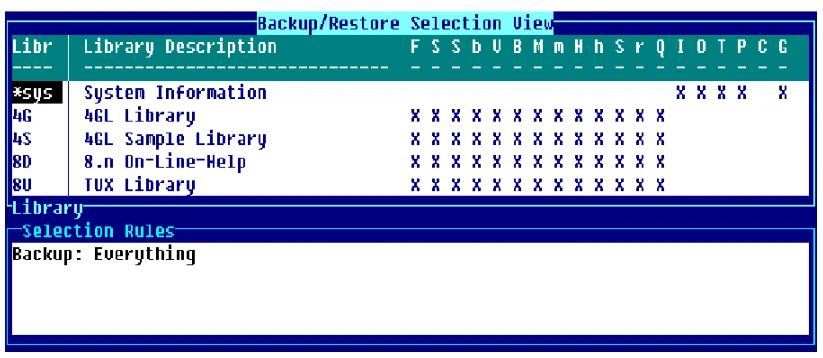
Everything This selection will display the Backup/Restore Selection View. For each library the specific definition types can be selected or unselected. All libraries and all definition types including system records and TSI libraries will be selected.
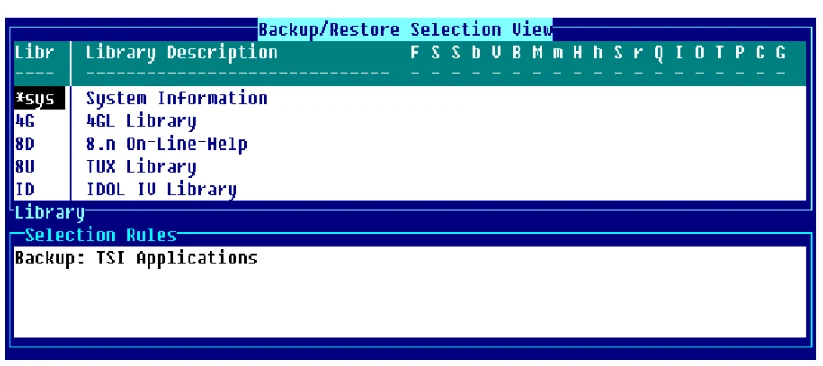
TSI Applications This selection will display the Backup/Restore Selection View. For each library the specific definition types can be selected or unselected. Only the TSI product libraries will be included. None of the definition types will be selected.
The system displays one of the following:
Backup - Selective
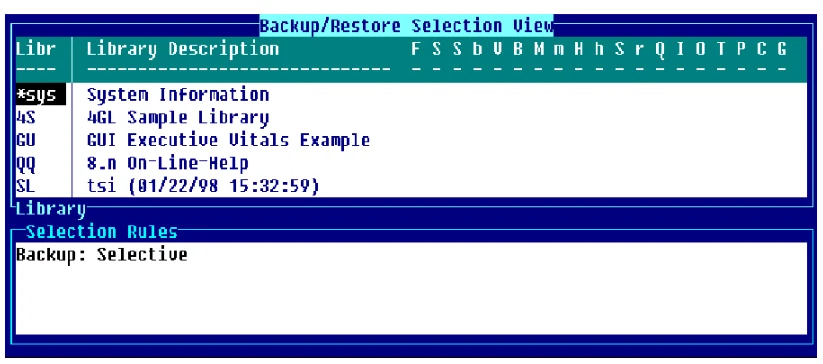
Backup - Non-TSI Application
Backup – System Records
Backup – Everything
Backup - TSI Application
The information below explains how to select definitions to be included in the backup.
The following applies to Selective, Non-TSI Applications, System Records, Everything, and TSI Applications but not Global Dictionary.
The following keys are available:
Enter Pressing Enter twice displays a window from which you may select the definition type.
- F4
- Exits and continues processing.
- F6
- Displays on-line help.
- F10
- Goes to the first position in a row, the last position in a row, or a specific row.
Position the cursor at the library name in the list and press the Left Arrow and Right Arrow keys to select the type of definitions to backup. Type X and press Enter to select a definition. The system displays a screen similar to the following:
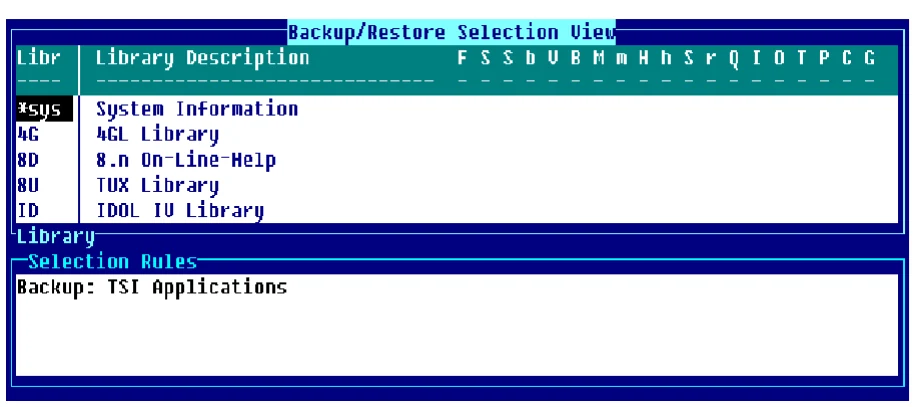
From the library name you may press Enter twice which will display the following toggle menu:
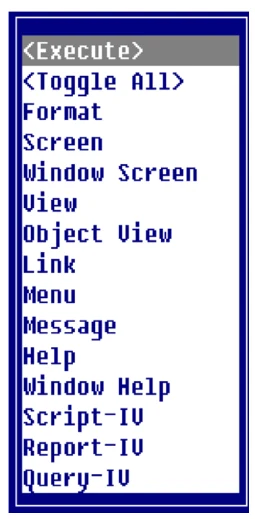
From the toggle menu highlight the options you would like to toggle and press Enter, the system displays an X to the right of your selection. To toggle all on or off select <Toggle All>. Once your selections are made highlight <Execute> and press Enter. This executes the backup with the specified/selected options. For more information on toggle menus, see Dictionary-IV Menus in the Dictionary-IV User Guide.
A special library, *sys System Information is included to allow the selection of system records and the Global Dictionary.
The following record types are valid for the *sys library only:
- Installation record
- Operator codes
- Printer table
- Terminal table
- Conflict indicator
- Global Dictionary
You may select from the following:
System Dictionary Class Definition F Formats
S Screens
s Window Screens
b Views
V Object Views
B Links
M Menus
m Messages
H Help
h Window Help
P Script-IV
r Report-IV
Q Query-IV
- System Information
- I Installation Record
O Operator Codes
T Terminal Table
P Printer Table
C Conflict Indicator
- Global Dictionary
- Global Data Elements G Global Dictionary
When you have made your selections, the system displays the following toggle menu:
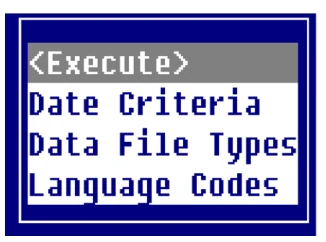
From the toggle menu above highlight the options you would like to toggle and press Enter, the system displays an X to the right of your selection. Once your selections are made highlight <Execute> and press Enter. This executes the backup with the specified/selected options. For more information on toggle menus, see Dictionary-IV Menus in the Dictionary-IV User Guide.
Date Criteria This option allows you to specify date criteria to determine if a definition type is to be included in the backup process.
Select this option and the system displays the following pop-up menu:
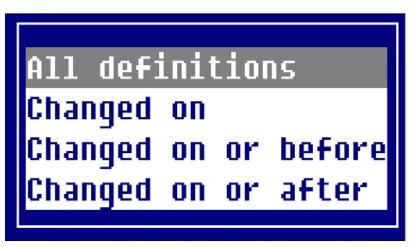
Select one of the following:
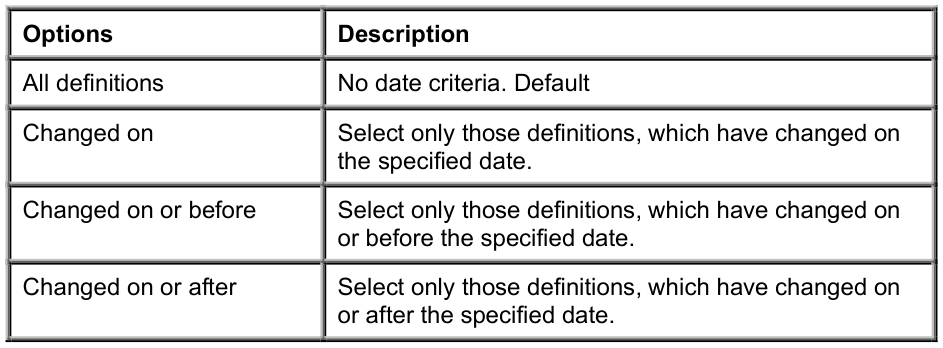
When you select a date criteria the system prompts:
Enter date:______
Type the date or press Enter to select the current date.
Data File Types This option allows you to specify which data file types are to be included in the backup process when Links are selected. The system displays the following toggle menu:
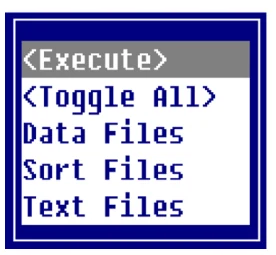
From the toggle menu above, highlight the options you would like to toggle and press Enter, the system displays an X to the right of your selection. To toggle all on or off select <Toggle All>. Once your selections are made highlight <Execute> and press Enter. This executes the backup with the specified/selected options. For more information on toggle menus, see Dictionary-IV Menus in the Dictionary-IV User Guide.
Select one of the following:
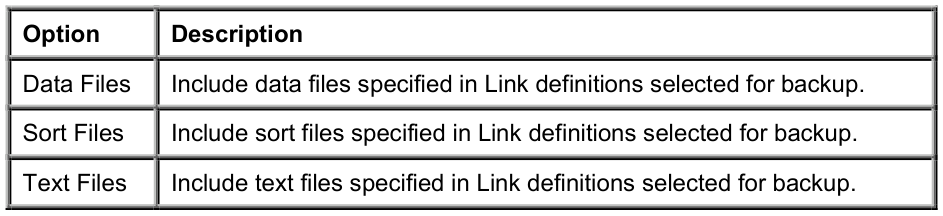
If a Link contains a file suffix, only those data files matching the current file suffix will be included. For more information see the Links section in the Dictionary-IV Developer Guide.
Data file names will be output to a file list (IDDflxxx) which can be used with the UNIX tar to cpio command to backup the data files to diskette, tape, or to an archive file.
Select one or more of the above file types.
Language Codes This option allows you to specify which language codes are to be used for the language code criteria. The system displays the Language Codes and you may select one or more of them to backup. The current language is the default.
The selection of language codes is not restricted to those, which have been enabled. Any of the valid language codes may be selected for the backup process.
Execute
Executes the backup with the specified/selected options.
Select <Execute>.
If only one library and one definition type for that library has been selected, the system prompts:
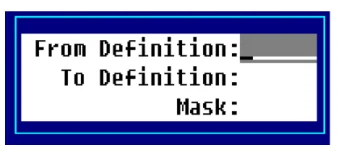
When all selections are made the system prompts:
Selections correct?
Select one of the following:
Y The system begins the backup.
N Exits back to the Backup/Restore menu.
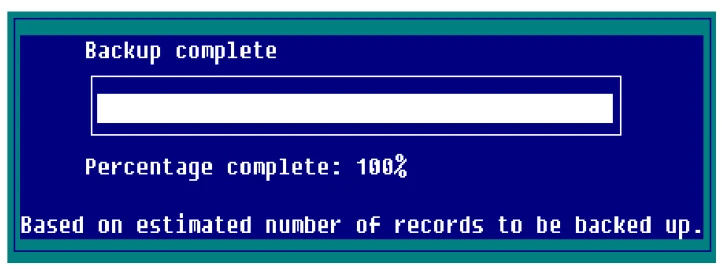
If you select Y the backup begins and the system displays a bar showing the progress of the backup:
Restore
Section titled “Restore”This procedure allows you to transfer Dictionary-IV components from the backup files into Dictionary-IV. The backup files are not erased by this procedure. The operation of the restore option is similar to that of the backup option.

Select Backup/Restore from the Dictionary-IV Utilities Menu.
Select Restore from the pop-up menu and the system prompts:
Enter name for backup file (IDDbkxxx): IDDbk______ IDDbk with 3 optional alphanumeric characters for the suffix is the suggested naming convention, however not required. The backup file name is not limited to 8 characters it can be up to 14 characters or can have a fully qualified path of up to 60 characters. A full path to the backup file can be used only if a hierarchical directory is defined in the IPL file. Type the backup file name and press Enter.
Press Enter and the system displays the following pop-up menu:
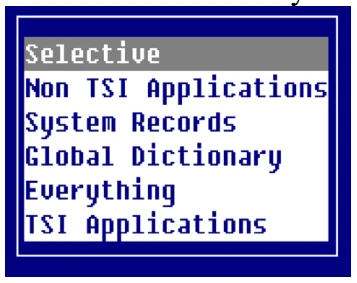
Select one of the above and press Enter.
The selections are the same as in the Backup section. For more information see the Backup section of this utility.
After you have defined your Restore criteria the system displays the following toggle menu:
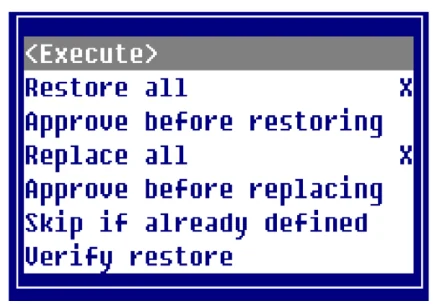
This selection allows you to select one restore rule and one replace rule. You also have the option to verify any combination of restore and replace rules selected. Once your selections are made highlight <Execute> and press Enter. This will execute the restore with the specified/selected options.
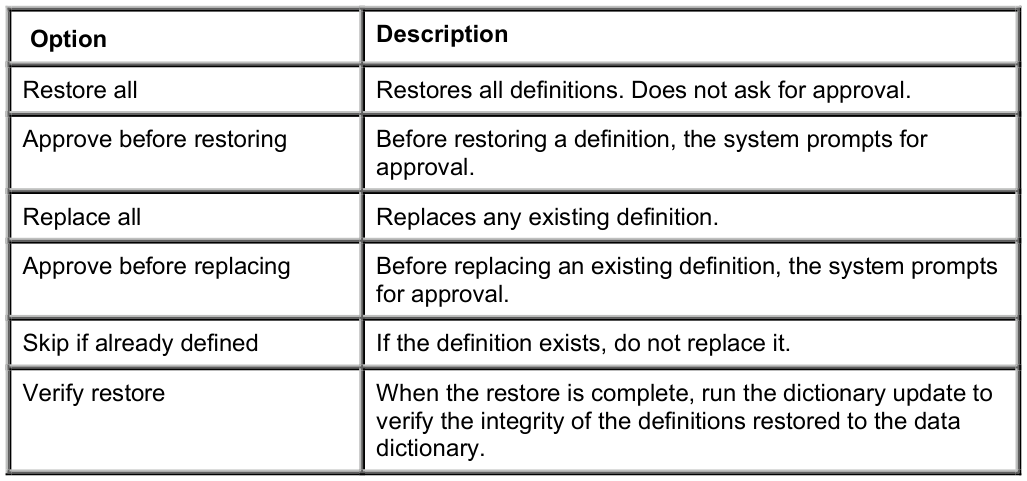
Make your selection and the system prompts:
Selections correct?
Select one of the following:
Y Begin the Restore.
N To exit.
Edit allows you to display a lookup of all the definitions in the backup file. You may then:
- Delete a definition.
- Insert a definition.
- Print a hard copy of the lookup.
Select this option and the system prompts:
Enter name for backup file (IDDbkxxx): IDDbk_________
Type the backup file name you want to display or edit and press Enter. The system displays a lookup of the definitions in that backup file.
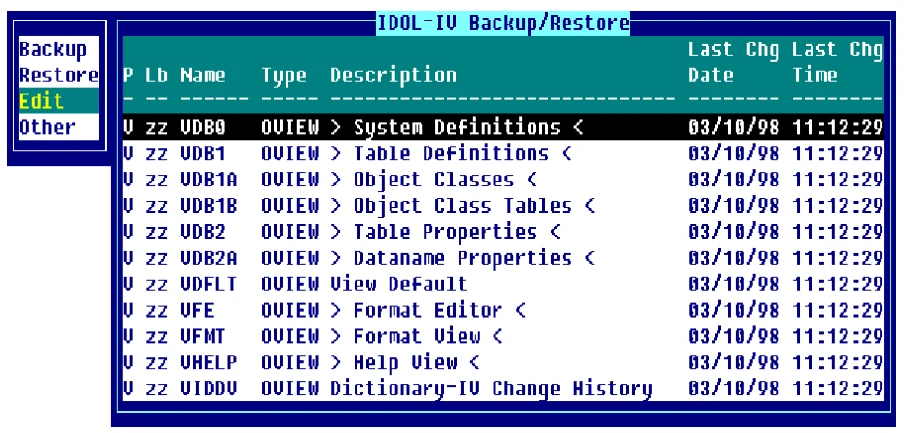
The following keys are available:
- Line Delete
- Deletes a definition from the backup file.
- Line Insert
- Adds a definition to the backup file.
- Up/Down Arrow
- Moves the lightbar up/down one row.
- Page Up/Down
- Moves the lightbar up/down one window.
- Home
- Goes to the top/bottom definition of the backup file.
- F2
- Moves the screen.
- F4
- Exits.
- F6
- On-line Help.
- F10
- Goes to the first match of the goto value.
Example:
B goes to the first Link definition.
FUT goes to the first Format definition in the UT library.
FUTC goes to the first Format definition beginning with a C in the UT library.
- F16
- Outputs a hard copy of the view to the defined printer.
Delete a definition
Position the lightbar on the file and press Line Delete. The system displays the following window:

The system prompts:
Delete this record?
Select one of the following:
Y To delete the definition from the backup file.
N To leave the definition in the backup file.
Add a definition Position the lightbar anywhere on the file and press Line Insert. The system displays the following window:

Type the following information:
P Prefix:
Select one of the following for the definition type. You may press F2 for a lookup at this field. Valid entries are:
F Formats
S Screens
s Window Screens
b views
V Object Views
B Links
M Menus
m Messages
H Help
h Window Help
P Script
r Report
Q Query
Lb Library Name:
Type the library name and press Enter. You may press F2 for a lookup of library names.
Name Definition Name:
Type the definition name and press Enter. You may press F2 for a lookup of definitions in the selected library for selected types.
The system prompts:
Add this record?
Select one of the following:
Y To add the definition to the backup file.
N To leave the definition out of the backup file. The system automatically places the definition in the proper order (by format, library, and file name).
This option allows you to regenerate a backup file and archive backup files to or from a floppy, tape or archive file. Select Other and press Enter. The system displays the following pop-up menu:
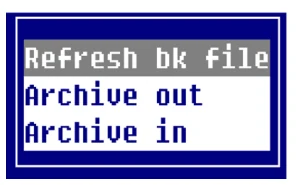
The system prompts:
Enter name for backup file (IDDbkxxx): IDDbk______
The system displays the default backup file name. You may type another file name. Press Enter.
Refresh bk file This option regenerates a backup file (IDDbkxxx) based on the current contents. It will not refresh a Global backup file (IDGbkxxx).
Archive out This option allows you to construct and execute the operating system’s backup commands to archive the backup files to floppy, tape, or into an archive file. There is also a command line option where any system command can be entered and executed.
Archiving into a file will create a file called IDDarxxx, which matches the suffix used in the backup file name. For example, if the backup file name is IDDbkTSI, the archive file name will be IDDarTSI.
The system displays the following pop-up menu:
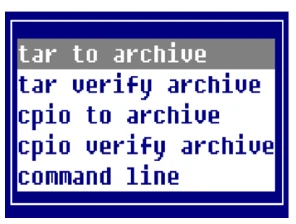
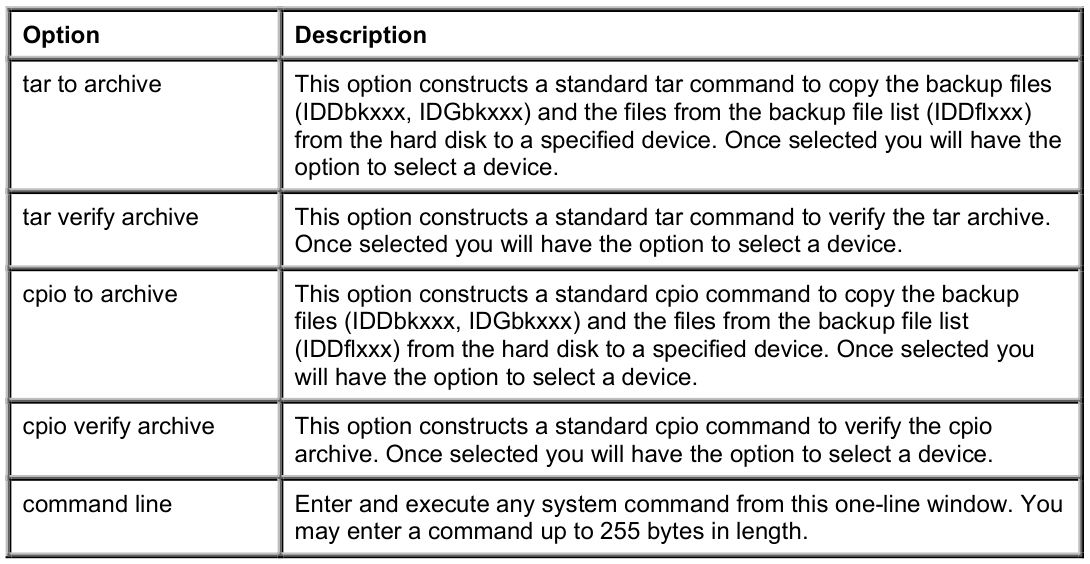
When you select tar or cpio to archive or verify archive, the system displays the following pop-up menu:
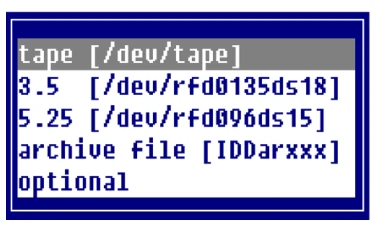
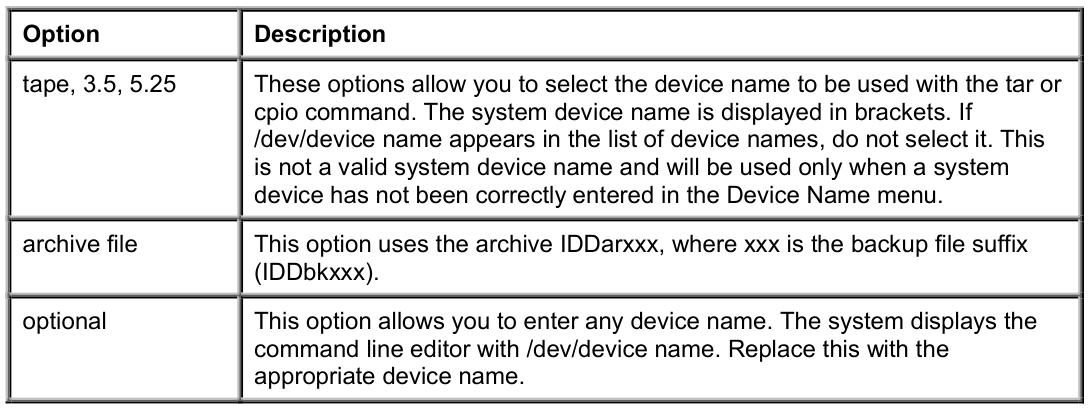
For more information see Backup/Restore Parameters later in this section.
Archive in This option allows you to construct and execute either tar or cpio commands to recover the backup files from floppy, tape, or from an archive file. There is also a command line where any system command can be entered and executed.
The system displays the following pop-up menu:
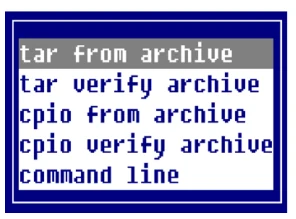
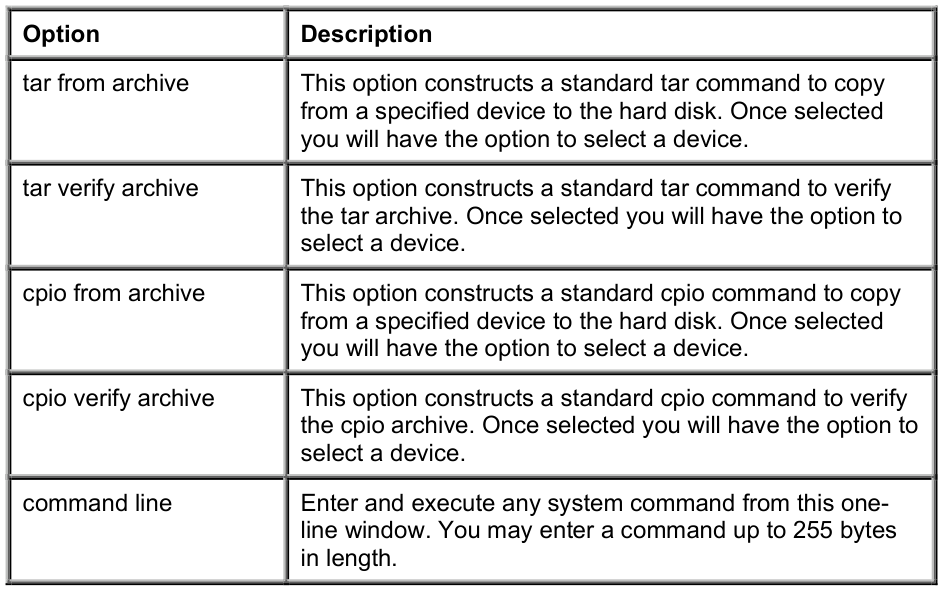
When you select tar or cpio to archive or verify archive, the system displays the following pop-up menu:
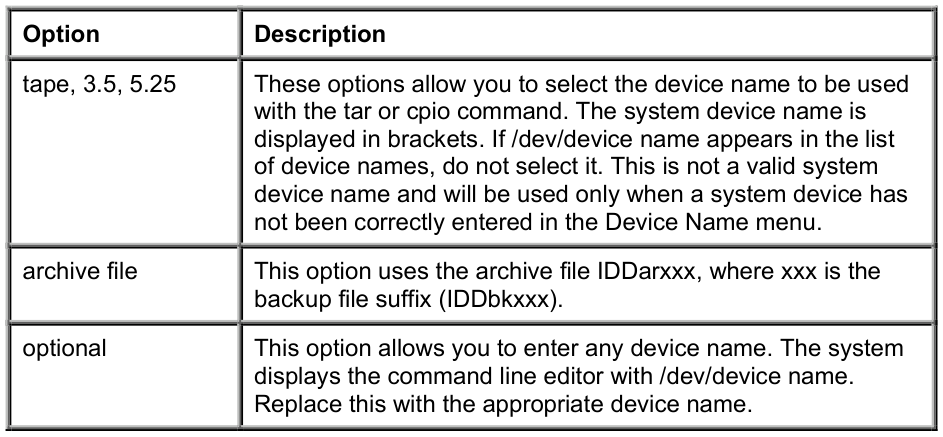
For more information see Backup/Restore Parameters later in this section.
From the Dictionary-IV Administrator Guide, version 8.9.1. Open this page in the PDF