

VIP tab
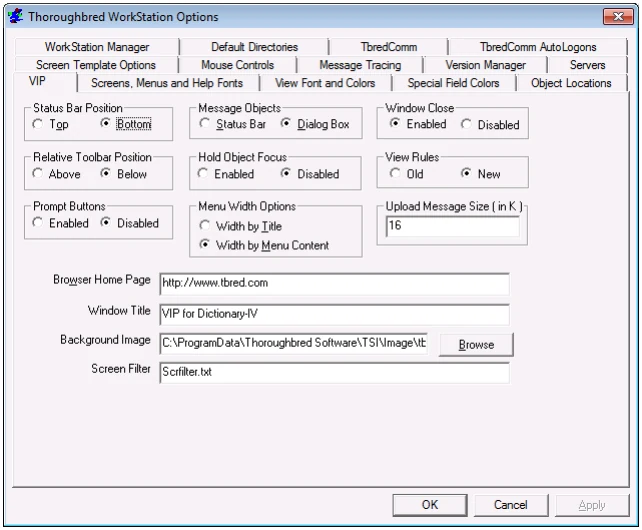
Status Bar Position All Prompt/Constant, View Prompt, and Screen Prompt messages are always displayed in the Status Bar. Non-input, yes/no and input messages can be displayed in the Status Bar or in a message Dialog Box. See Message Objects.
Select Top/Bottom to position the Status Bar in the GUI Server Window.
For example, if your message is “Select F1 to Edit,” you have a choice of having it appear at the top of the window or at the bottom of the window. Open a Screen view in Dictionary-IV or OPENworkshop you will see a message at the bottom of the window
(F1 to Edit, etc.).
Relative Toolbar Position This option provides control over the position of the Toolbar relative to the Status Bar when both are displayed at the top or bottom of the main VIP window.
When Above is selected, the Toolbar will be displayed above the Status Bar.
When Below is selected, the Toolbar will be displayed below the Status Bar.
Prompt Buttons This option allows you to select how Screen and View prompt messages are to be displayed in the Status Bar. This applies to View VP[x] and Screen SP[x] prompt messages, it does not apply to type “P” messages stored in a message dictionary.
When Disabled is selected, the prompt messages will display as plain text.
When Enabled is selected, the prompt messages will be displayed as buttons. This option makes use of the mouse Control Key(s) to convert plain text into buttons (see Mouse Control tab).
VIP will define a button by scanning the prompt text for control keys. A set of control key characters defines the start of a button. The end of a button is defined when another set of control keys is matched or the end of the prompt text is encountered. Any text leading up to the first set of control keys will be displayed as plain text.
Example:
Assume the Mouse Control Key(s) are defined as “<>”. The following prompt message “Item Code Options: <F1> Report (By Item Code) <F2> View sales detail” will be converted into two buttons as shown below:
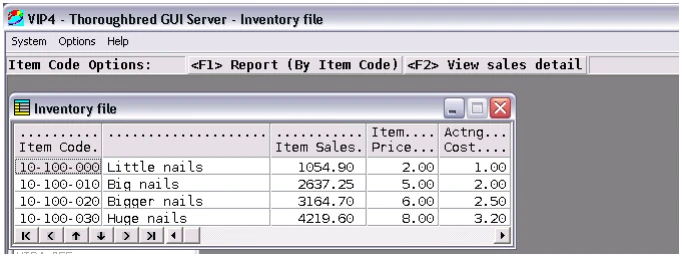
Selecting the <F1> Report (By Item Code) button is equivalent to pressing the F1 key. Selecting the <F2> View sales detail button is equivalent to pressing the F2 key.
To accommodate variations in prompt message text, it is possible to define prompt text search and replace values in the Tbred.ini file.
singlepromptbuttons=<search>:<replace>, <search>:<replace>,…..
singlepromptbuttons= : The Tbred.ini key entry. This must be created in the [VIP4] section.
<search> The value to search for.
<replace> The value to replace with.
The search and replace values must be separated by a semi-colon (“:”).
Multiple search and replace values can be specified and must be separated with a comma (“,”).
The following example will search for all instances of <CR> and replace them with <Enter> and search for all instances of <CR>/<Enter> and place them with <Enter>.
[VIP4]
singlepromptbuttons=<CR>:<Enter>,<CR>/<Enter>:<Enter>
The prompt search and replace feature is not managed from the WorkStation Manager, Tbred.ini must be manually edited. To locate the Tbred.ini please refer to the Path Definitions and Conventions section in this manual.
Message Objects Select how/where you want to display non-input, yes/no and input messages, either the in the Status Bar or a Dialog Box. All Prompt/Constant, View Prompt, and Screen Prompt messages are always displayed in the Status Bar.
Set the colors you want to use for displaying messages in the status bar from the VIP for Dictionary-IV menu bar. Please refer to that manual for more information.
For example, select Status Bar if you want to display “This option is invalid – OK” in the Status Bar, which will be positioned according to the Status Bar Position above.
For example, select Dialog Box if you want to display “This option is invalid – OK” in a separate dialog box appearing in the window.
Hold Object Focus
Forces the focus to stay on the current object. By default, this option is not enabled.
When this option is enabled, the user will not be able to click on any other VIP object except for the Toolbar, Status Bar and messages. This guarantees that the current VIP object will always be on top. However, the user will only be able to move the current object window. If your application layers windows this could prevent the user from accessing information contained in a window overlaid by another.
Menu Width Options
Controls the width of graphical menus.
-
Select Width by Title to size your menus based on the length of the title in the title bar. The longer the title, the wider the menu will be.
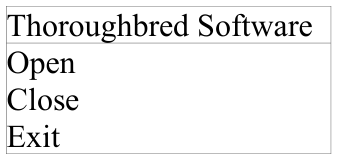
-
Select Width by Menu Content to size your menus based on the length of the menu options. The longest option line determines the width of the menu.
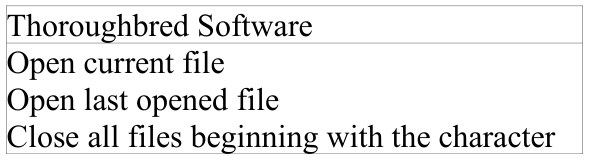
Window Close Use this option to Enable or Disable the VIP close button (X button at the top, right of the main VIP GUI Server Window).
View Rules
Select Old or New for the column padding rules.
- Old - Data is centered in a column. Masking data to the defined column width results in the data being either left or right justified. Depending upon the maximum data width, the column width, the optional column mask, and the view fonts this behavior may or may not be obvious. For more information see the Dictionary-IV Developer Guide (Format View, Padding).
- New - All date fields, all numeric fields, and all fields where the padding types are 1 or 3 will be right justified. All other field types and padding types will be left justified. For more information see the Dictionary-IV Developer Guide (Format View, Padding).
Upload Message Size (in k)
This parameter defines the size (in k) of the messages sent from the client to the host. The default value is 16k. Most host bound messages are very small; however, communication from the client to the host when saving a GUI screen definition back to the host, does communicate large blocks of data.
Browser Home Page Controls the URL used when the TS WebBrowser is invoked from the GUI Server menu bar. This field can be ignored if TS WebBrowser is not being used.
Window Title Enter the window title for all VIP GUI Server windows. If no title is specified, the default window title will be “VIP – Thoroughbred GUI Server”. (See below.)
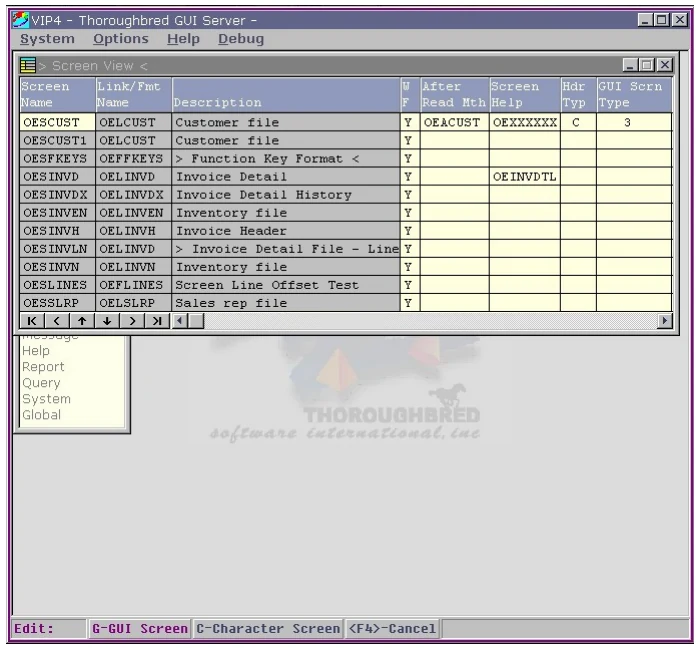
Background Image
Enter the path and file name or use the Browse button to locate a graphic file to use as the background image in the main VIP GUI Server Window. The default path for
background images is vip-data-path\Tsi\Image. Graphic files may be Bitmap or JPEG image files. The Thoroughbred logo in the previous example is where the background image will appear.
The following example references an image located in the default directory:
Background Image: tbred_logo_gray.jpg
The following example references an image located in an alternate directory:
Background Image: C:\MyPictures\tbred_logo_blue.jpg
Four image files have been provided in the *vip-data-path\*Tsi\Image directory. They are tbred_logo_gray.jpg, tbred_logo_gray_.bmp, tbred_logo_blue.jpg, and tbred_logo_blue.bmp.
Screen Filter Enter the full path and the name of the screen filter file. The default screen filter file is vip-data-path\TSI\Scripts\Scrfilter.txt. If a screen filter name is specified it will be applied when generating default graphical screens. If no screen filter name is specified no filter will be applied. See the VIP for Dictionary-IV manual for more details on Screen Filters and generating default graphical screens.
From the WorkStation Manager, version 8.9.1. Open this page in the PDF